
Are you an educator with a great idea for a children’s book? You’ve come to the right place! If you, like myself and so many others I’ve heard from, want to publish a book but have no idea how to get started, see below for all my best tips. It's easier than you might think to become a self-published author if you know the basics of the publishing industry.
In 2015, a longtime dream of mine was realized when I published a children’s picture called Diary of a Real Bully. The idea for the book came to me over a decade before when I came to the harsh realization that nice kids are mean. I became fascinated by the bully behaviors I witnessed year after year and was determined to make a change. My goal was to help my students see past the bully stereotypes they see in the media, and instead recognize that we all act like bullies sometimes, regardless of our size, appearance, or social status. I wanted them to understand that a bully is not a person, it is an action that negatively impacts others. I did that by creating a character that is the opposite of what they would expect a bully to be, then taking that character through a journey with the most common bullying situations I saw with my students year after year.
For the first few years, I shared the book with my class from a duo tang folder with printer paper and zero illustrations. It was all about the message at the time, because I didn’t have the tools or resources to bring my full vision to life. When I became Michigan Teacher of the Year in 2015, my family and friends encouraged me to get the story published so I could share it with people beyond my classroom. So, I did the research and took the steps to get the book made. Through author visits, workshops, and keynote presentations, I’ve had the honor of spreading my message to kids, teachers, parents, and leaders across the country. Bringing the book from an idea in my head to a tangible, shareable tool is one of my greatest accomplishments. Your book can be one of your greatest accomplishments, too. Here’s what you need to know:
Picture Book Self Publishing Tips
Step 1: Understand the Industry Standards
- Number of Pages - Book printing is typically done in multiples of 8, so plan your book to be 16, 24, 32, 40, etc. pages so that it is cost effective. This includes all interior pages like title page, dedication page, and everything else inside the book. Do not include the front or back cover in that total. You can include blank pages in the beginning or end of the book if needed, which you’ll often see in children’s books because of the multiples of 8 rule. 32 is the most common and most cost effective number of pages, so think about designing your book to fit that.
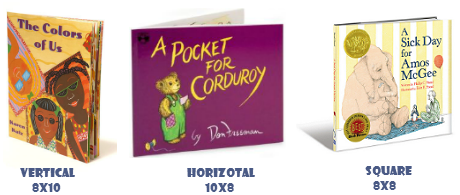
- Book Size and Orientation - Standard size (or trim size) for books vary, but most picture books are either 7.5”x7.5", 8”x8”, 7"x10", or 10"x8". You’ll also need to decide if you want the orientation to be vertical, horizontal, or square. Check with your printer before the graphic designer begins laying out the book electronically so that you don’t increase costs with a non-standard size option. The first series of books I published, Chaldean for Kids, are square 8x8. Diary of a Real Bully, my second book, is vertical 8x10.
- Book Binding - PrintNinja.com offers a great explanation of the differences between book bindings, with pictures and details about each. If your picture book will be 32 pages or less as suggested above, I recommend saddle stitching, which is simple, cost effective, and beautifully showcases illustrations as the pages lay flat when open.
- Paper Stock - Paper weight, both for the cover and inside pages, is another consideration that can be quite complex because it involves the paper’s weight, thickness, color, and finish. You can do your research, but I’ll simplify your options by suggesting 80# gloss paper stock with lamination for the cover, and 100# gloss paper stock for the inside pages. That’s what my printer had recommended as standard for my book and it turned out exactly as I had hoped.
Step 2: Prepare your Book
- Storyboard - Sketch out the layout for the book through a storyboard - decide what text will be on each page and include a written description of what you’d like the illustration to look like. Consider that some pages will have single page illustrations and others could have two page spreads. Don’t forget to include a title page, copyright page, dedication page, and about the author page, or any combination of those if you need to put some together to make your page layout work better.
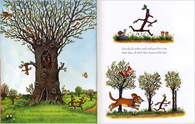 | 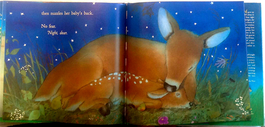 |
- Illustrations - Explore different illustration styles to see what will complement the content of your book. Also, distinguish between boxed, vignettes, spot, and full bleed illustrations with this handy article. These decisions can be made with your illustrator.
Step 3: Connect with Professionals
- Illustrator - Consider hiring a local artist, even a teacher or student that has an illustration style that matches your vision. Or, if you need an illustrator with more experience, try posting a proposal on Upwork or Fiverr to find freelancers. You can set the price and choose from bids after exploring potential artists’ portfolios.
- Graphic Designer - The graphic designer will develop the electronic layout of your book, likely through design programs like InDesign or Adobe Illustrator. He or she will design your front and back covers, add your text and illustrations, and work with your printer to ensure the specs are accurate and the electronic file is in the correct format they’ll need. If you’re lucky, you can find someone that can do both the illustrations and graphic design. If not, Upwork and Fiverr have graphic design freelancers as well.
- Printer - Research online printers and get quotes using specifics about the design elements discussed above. The most cost effective printers print the books overseas, mainly in China. Working with overseas printers does take additional time, especially with shipping, so plan to place your order 2-3 months before you need copies of your book in print. It is totally worth the money to get a proof from the printer. Both times I have published books, the proofs came in with errors (my fault, not theirs), but I was able to correct them before I ended up with the entire order. I used DIYA USA for both of my printing projects and was very pleased with the quality of the books, especially because the price was very reasonable for a self publisher like me. You can also check out Print Ninja or Lightning Press for quotes. Note that the higher the quantity of the order, the lower the cost per book. I typically place orders of 1,000-2,000 books at a time, store them in my basement, and distribute them myself through my website, amazon, author visits, and trade shows.
Having full creative control and maintaining your rights as author are just some of the many benefits of self-publishing. Most people believe the process is too complex to even explore, but I can speak from experience that it is doable. The most important thing is that you believe in your idea and are willing to take the time and energy it takes to bring it to fruition. You are not alone in the process. Feel free to email me with any questions you have and let me know once your book is published so I can help you share it! Educators make great authors because we know best what kids need and respond to. You can be the next one to share your insights with the world.
 RSS Feed